Takedown and Drain Your Edge TubUpdated a year ago
Detailed takedown video can be found here.
Step 1) Turn the Chiller off
Turn the Chiller off by toggling the Power Switch on the back of the Chiller to the down “off” position.
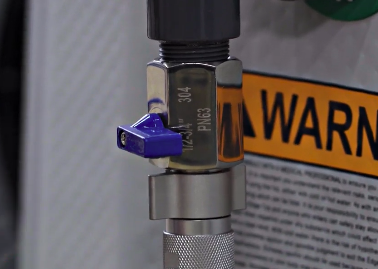
Step 2) Close the Valves
Turn the Tub Valve Fittings to the closed (perpendicular) position (see image).
Step 3) Drain the Tub
Three methods can be used to drain the Tub: Option (a) is best used outdoors and options (b) and (c) are best used for controlled draining of the tub.
Disconnect the red “Water In” hose from the Chiller by rotating the Hose Connection Fitting counterclockwise. Direct the hose to the desired area for drainage and open the valve. Water will flow out of the hose until it reaches the Lower Water Fitting. The remaining water can be removed by turning the tub over.
Disconnect both hoses from the Tub by rotating the Hose Connection Fittings counterclockwise. The red “Inlet” hose from the Chiller should be placed inside the tub as shown (see image). The green “Outlet” hose from the Chiller should be directed to the desired location for drainage and the Chiller can be turned back on. The Chiller will pump water out until the Tub has been drained down to the end of the water hose. The Tub can be slightly tipped as the water level gets low to remove the last bit of water. Be sure to turn off the Chiller immediately when the Tub has been drained to avoid damaging the Chiller.
Purchase a submersible Sump pump like shown. Connect your garden hose to the pump and drop the pump into the water. When you plug the pump in, water will begin draining. Please visit our help center or reach out for recommendations on Sump pumps.
Step 4) Disconnect the Hoses
Once the Tub is drained, the hoses can be disconnected from the Tub and Chiller by rotating the Hose Connection Fittings counterclockwise, and the Chiller can be unplugged.
Step 5) Dry the Tub
The Tub should now be dried inside and out (including the bottom) with a towel to prevent mildew from developing. This is also a good time to clean with mild soap and water if the Tub has not been cleaned recently.
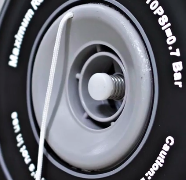
Step 6) Deflate the Tub
Remove the Inflation Valve Cap with a counterclockwise turn. Press the Inflation Valve Pin to allow the air to be released. The air will release aggressively so don’t be startled! Remove the remaining air by attaching the Inflation Hose to the “Deflate” side of the Double Action Hand Pump. When deflating the Tub, check to ensure that the Inflation Valve Pin is in the depressed (out) position (see image). Connect the Inflation Hose to the Inflation Valve with a quarter turn clockwise to attach. Deflate the Tub using the hand pump until all air has been removed and remove the inflation hose with a quarter turn counterclockwise. Replace the Inflation Valve Cap with a clockwise turn. The Tub Valve Fittings should be removed by rotating the Threaded Collar counterclockwise.
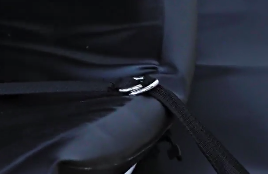
Step 7) Fold the Tub
The Tub can now be folded for storage. First, fold the branded “Edge Theory Labs” panel of the Tub inward, and allow the end sides of the Tub to fold towards the center. The back side of the Tub can now be folded over the branded side of the Tub so that the tub is now flat. Fold the right side of the Tub towards the center, with the crease being just towards the center of the right Water Fitting, and repeat on the left side. You should now have a tri-folded Tub. Hold the tri-folded Tub with one hand, and with the other, place the Storage Strap under the Tub. Fasten the Storage Strap and tighten it (see images).
Step 8) Pack the Tub
Place the Tub, Cover, Hoses, and Double Action Air Pump into the backpack. This is best done by starting with the Tub, then the Tub Cover, then Double Action Air Pump, and finally the Hoses.
Step 9) Drain the Chiller
First, remove the Chiller Drain Cap. Then, unscrew and empty the Lower Water Filter Housing. Then, unscrew the External Water Strainer. The unit can be tipped slightly back to remove the water inside the Chiller. Once drained, replace the Chiller Drain Cap and Lower Water Filter Housing. Finally, replace the protective Chiller Fitting Caps on the Inlet/Outlet connections.
You are now ready to take your adventure on the road!