Setting Up Your Edge TubUpdated a year ago
Detailed setup video can be found here.
Step 1) Unbox your Chiller and Tub
Remove the Chiller and Tub from their shipping cartons, and remove the protective wrapping. We recommend keeping the Chiller box for future transportation needs. When choosing your location, select a flat and smooth surface that is free from objects that could potentially puncture or damage the bottom of the Tub. A water source and 120v power source should be accessible. We recommend setting the tub up in a sheltered area if being set up outdoors for an extended period of time for the longevity of your product. Remove the Tub from the Carrying Backpack, then remove the Storage Strap and set it aside. If using the optional Protection Mat, first place the mat down in the desired location. Unfold the Tub in the desired orientation.
Step 2) Install the Valve Fittings to the Tub
The Threaded Collar on the Valve Fitting should be screwed onto the Tub Fitting by rotating it clockwise until hand tight. Do not tighten with tools. The Valve Fittings should be oriented as shown. 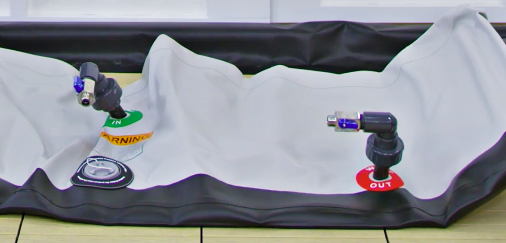
Step 3) Inflate the Tub
Inflate the Tub using the included Double Action Air Pump, ensuring that the Inflation Hose is connected to the “Inflate” side of the pump (see image a). Open the Inflation Valve Cap on the Tub by rotating counterclockwise. When inflating the Tub, check to ensure that the Inflation Valve Pin is in the depressed (out) position or the air will be released after the Inflation Hose is detached (see image b). The Inflation Hose connects to the Inflation Valve with a quarter turn clockwise to attach. Inflate until the gauge reads 10 PSI. Do not over-inflate or product damage will occur. When done inflating, replace the Inflation Valve Cap with a clockwise turn.
a) 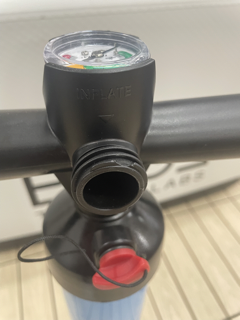
b) 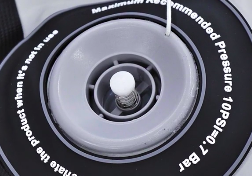
Step 4) Install the External Water Strainer
First, remove the protective Chiller Fitting Caps by rotating counterclockwise. Then, install the Inner Water Strainer by turning clockwise onto the red “Inlet” fitting on the Chiller. Ensure the Strainer O-ring near the Chiller body is in place (see image). The silver Water Strainer Cover fits over the Inner Water Strainer and should be tightened until hand tight and the enclosure is flush with the Chiller body.

Step 5) Connect the Chiller to the Tub
Before connecting the hoses, ensure that there is a Hose O-Ring in place inside each end of the four Hose Connection Fittings. If there is not, place an o-ring from the spare parts bag to avoid leaking. The green “Water In” fitting on the Tub should connect to the green “Outlet” on the Chiller. The red “Water Out” fitting on the Tub should connect to the red “Inlet” on the Chiller. To tighten, thread on the Hose Connection Fittings and rotate clockwise. The threads should tighten easily and smoothly. If resistance is felt immediately, try attaching the hose again. Hand tighten until resistance is felt. Please Note: The Hose Connection Fittings should be hand-tightened only; do not use tools. Overtightening may cause leaking or damage.
Step 6) Fill the Tub
Check that the Chiller Drain Cap and hoses are in place. Remove the plastic and insert a filter into the Water Filter Housing, and then fill it with water. Ensure the Filter Housing O-Ring is in place in the Upper Water Filter Housing. Install the Lower Water Filter Housing by turning right if facing the back of the Chiller until hand tight. Do not use the filter wrench to tighten the water filter housing. It is only for loosening. The Tub can now be filled with water up to the “Fill Level” line. Overfilling may cause water to overflow from the Tub for some users, though you may fill to your preference.
Please refer to the Water Maintenance Instructions for the weekly protocol for checking the condition of the filter and how and when to change it.
Step 7) Open valves
Once the Tub has been filled, confirm the Tub Valve Fittings are in the open (parallel) position (see image). Ensure this step has been completed to prevent damage to Chiller, and the valves are always in the open (parallel) position any time you turn your unit on. Damage will occur if the valves are closed when the machine is turned on!

Step 8) Power on the Chiller
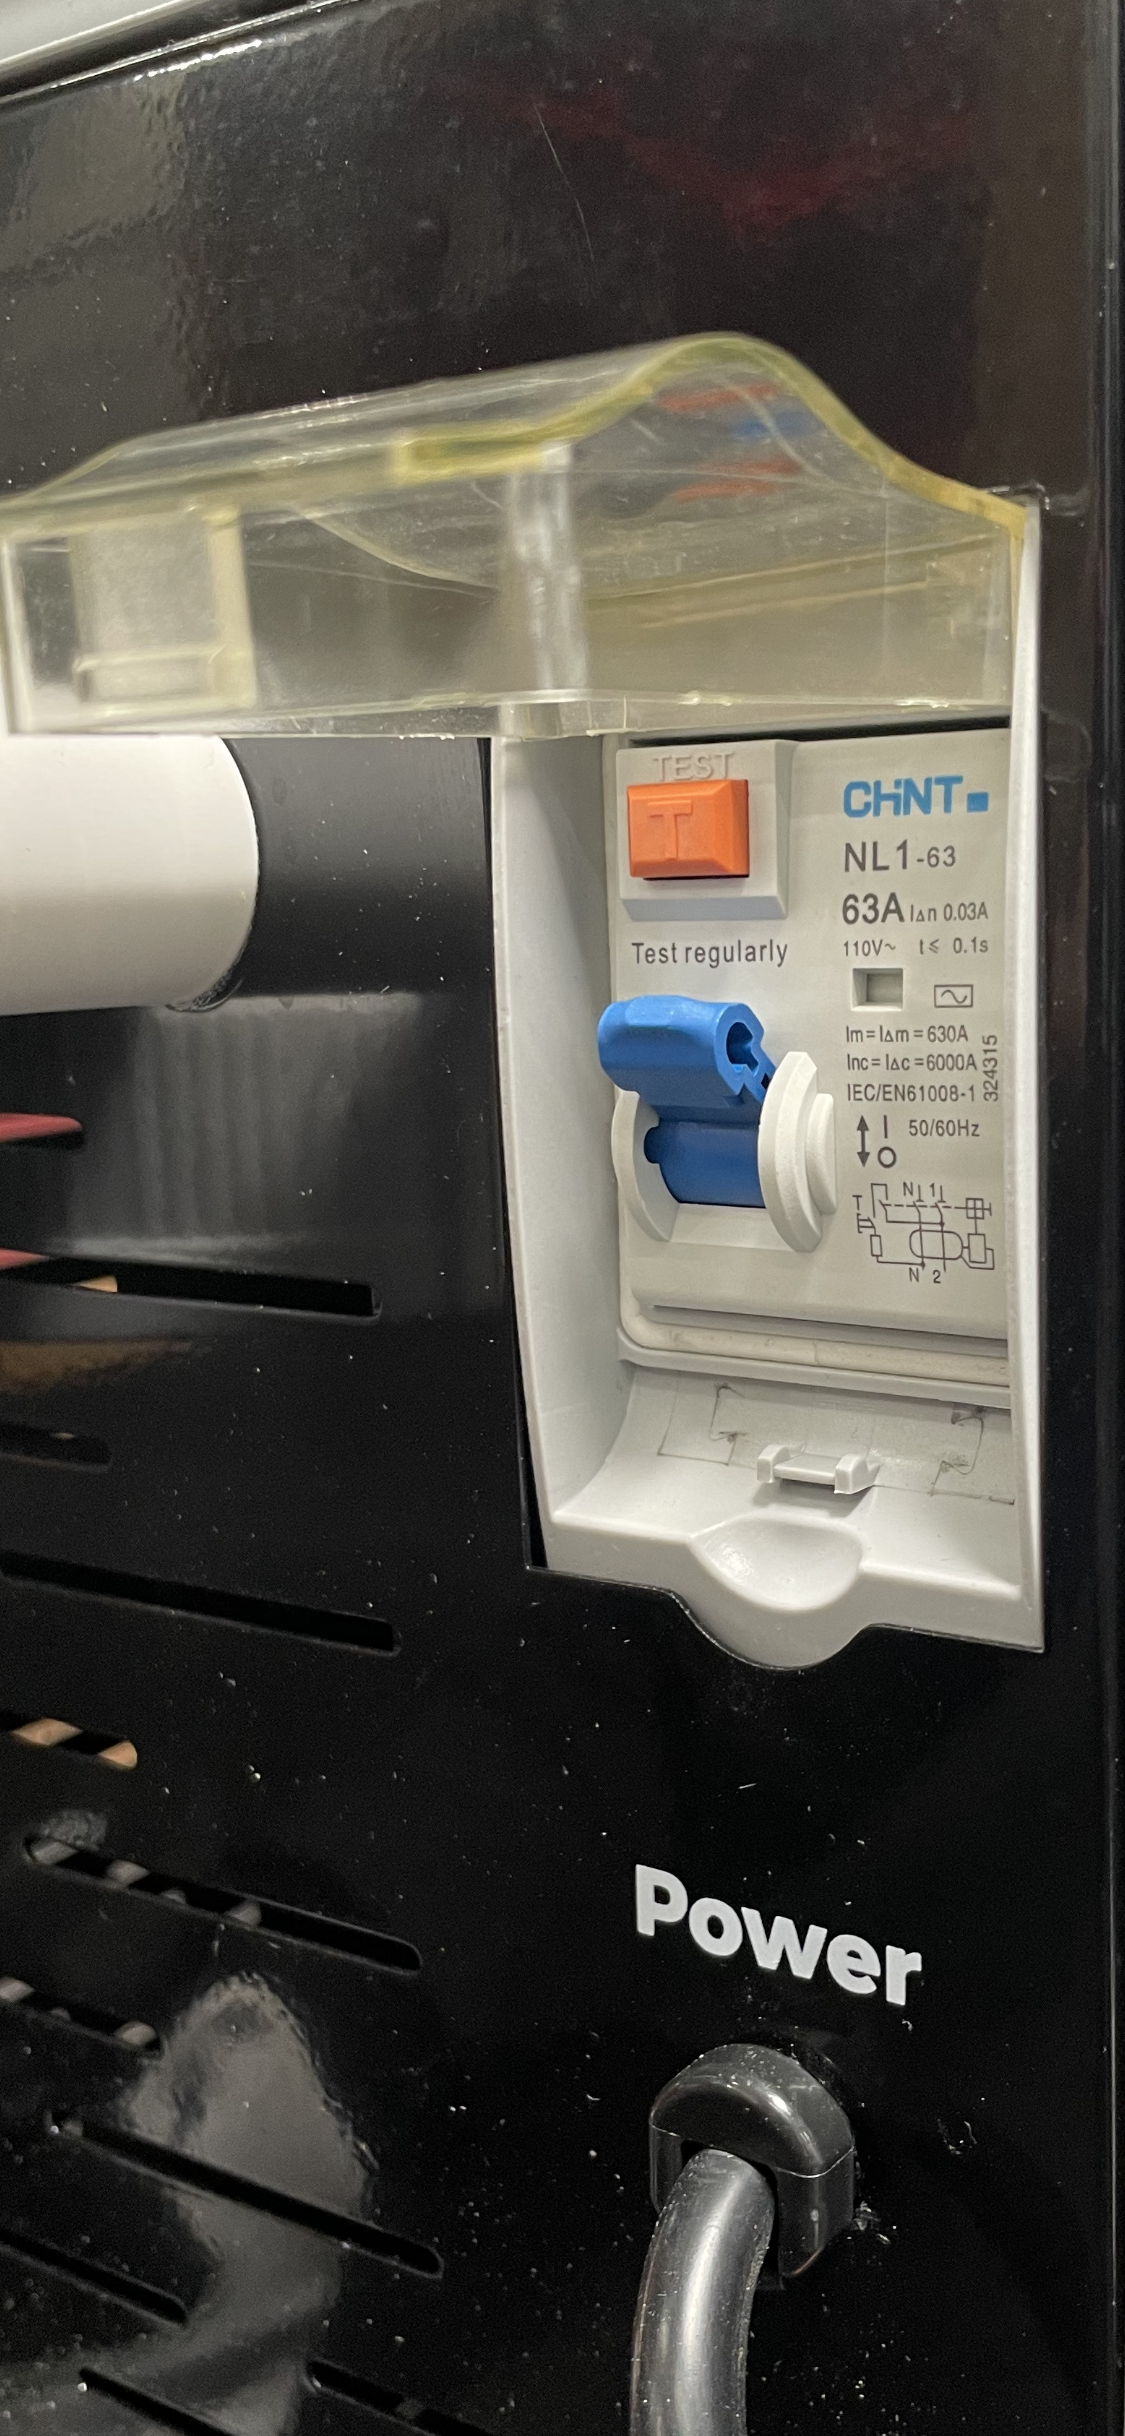
Plug the Chiller into a standard 120v grounded power supply with a 15 amp minimum circuit and test the GFCI functionality. To perform the test, first, ensure the Power Switch on the back of the Chiller is up in the “on” position, and then press the orange “T” Test Button above the Power Switch. The Power Switch should flip to the down “off” position. Now flip the Power Switch back up to the “on” position. (see image). If this test does not cause the Power Switch to turn off, do not proceed, and contact support for assistance. Place the Power Plug in an elevated position off the ground and away from water. Do not handle it with wet hands. You may now turn on the Chiller by pressing the “Power On” button on the display screen. The Chiller may take up to 2-3 minutes to purge air from the system and will flash “01.x” or “02.x” while purging. Once this has been completed, this code will change to the current water temperature and water will flow from the “Water In” fitting on the Tub, and the Chiller will begin cooling or heating. If the “FL” (Flow) error appears, or if this step takes longer than 2-3 minutes, check that the Valves are open and that the hose connections and filter housing are connected properly, and then repeat this step.
Step 9) Set your temperature
To change the temperature set point, press and hold the “S” key for 2-3 seconds until the Set Point flashes, and then use the up or down arrow keys to set your desired temperature. Press the “S” key once more to confirm the setting. Your Tub will reach minimum or maximum temperature in about 3 hours depending on ambient temperature and set point. Child lock can be enabled by pressing and holding both the “Up” and “Down” arrow keys simultaneously until a beep is heard and a lock appears on the screen.
Step 10) Startup water sanitation
Prior to use, the water should be treated with the startup Sanitizer dose. The startup dose is below and should be used any time the water is replaced in the Tub.
Add 60cc (2 Measuring Cups) of Oxidizer into the water
Wait 15 minutes
Add 15cc (½ Measuring Cup) of Sanitizer into the water
Wait 15 minutes before entry into Tub
Please refer to the Water Maintenance Instructions for the weekly protocol for maintaining clean water in your Tub.
Step 11) Cover your Tub
Finally, put the Cover on if the Tub will not be immediately used, and secure the four Locking Buckles. Note that the factory combination code for the Locking Buckles is 0-0. See the “Setting Buckle Code” write-up in section 9 for instructions on how to change the combination code.
Enjoy your new Edge Tub!
Please watch the Water Maintenance Instructional video (HERE) for the weekly protocol you need to follow to ensure the water stays clean and clear. Enjoy!